Installation
Blackstone Roofing’s installation practices differ greatly from many of our local peers. We do everything to code and to the manufacturers specifications. For specific details about the products and materials Blackstone Roofing uses, click the hyperlink or go to ‘Products and Materials‘ and ‘Free Upgrades‘ under ‘About‘. There are specific details where our competitors fail to accomplish this feat. The following is a general step-by-step overview of the installation process:
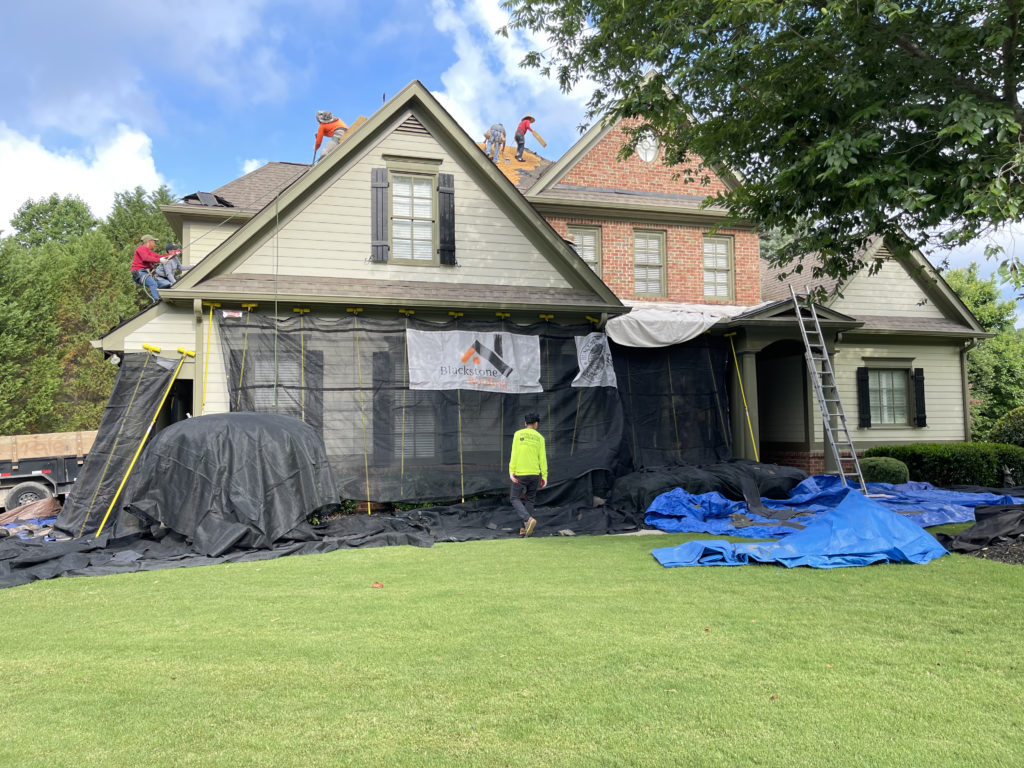
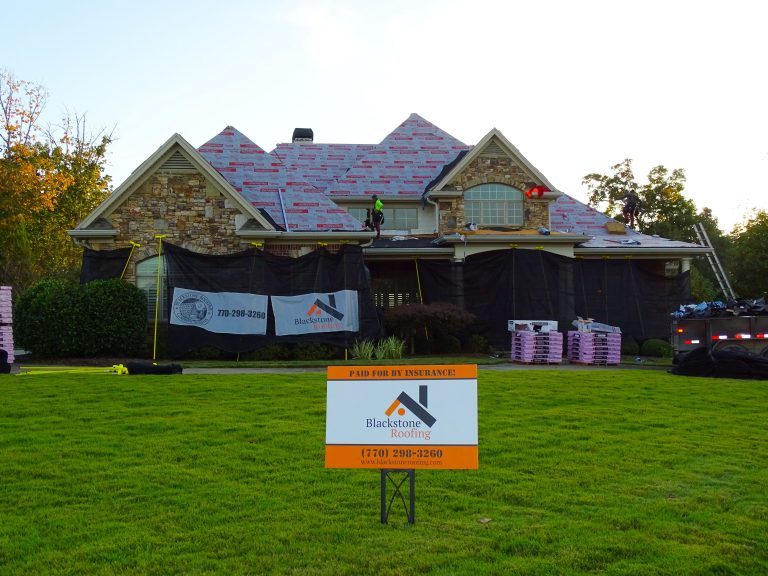
The first step of a proper roof replacement is to do our best to protect you home and landscaping. This includes special care around large windows, flowerbeds, landscaping, ponds, waterfalls, and pools.
Blackstone Roofing does a number of things different when it comes to this protection. We use a mesh netting system to protect the exterior walls of your hose from falling debris during the tear-off and install process. Further, we use these mesh nets over landscaping and flower beds in order to protect these features without burning and suffocating them with a plastic tarp on hot Georgia summer day.
Metal roof sections (typically found over porches) can get torn up when replacing the main shingle roof sections. We use thick drop cloths to protect these sections from damage in order to make sure they look just as good as they did before the new shingle roof.
Next is to strip off the old roof all the way down to the OSB or Plywood decking. All of the flashing will be removed and replaced later on with new flashing. The decking will be checked for water damage, rot, and for a proper nail-able surface. Any decking that is not solid and does not comply with code will be cut out and replaced.
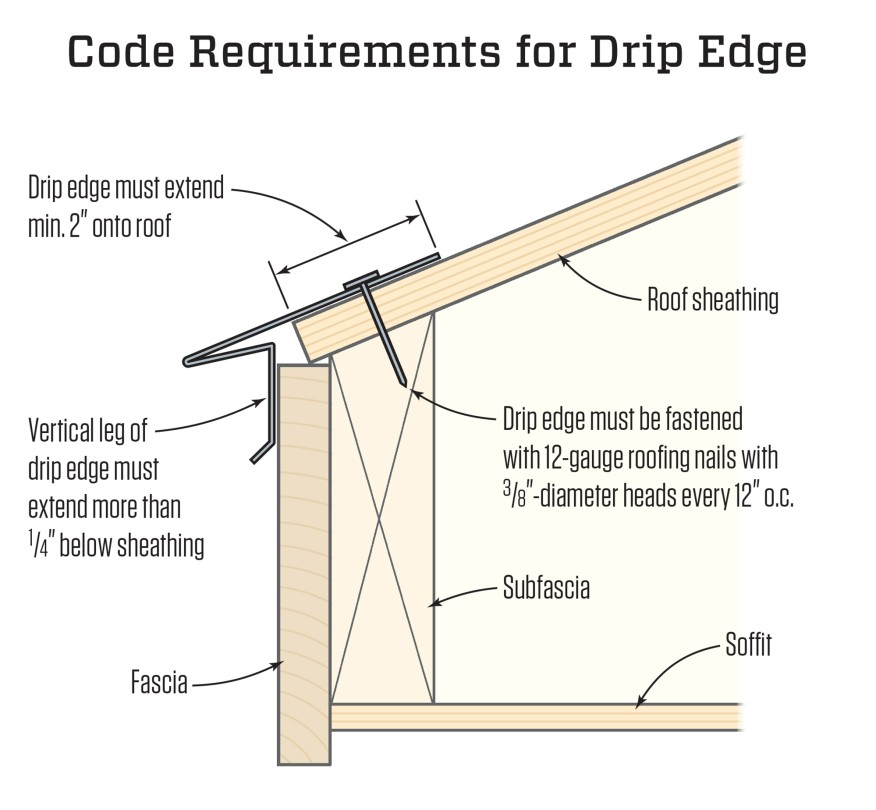
The next step is Drip Edge. Drip Edge is a newer Georgia code item and is a metal flashing that goes on the rakes and eaves of your roof. It extends a minimum of 2″ onto the deck of your roof and at least 1/4″ below the decking. It protects from water curling behind your fascia board to prevent rotting of your fascia boards and soffits. It will go under the underlayment on the eaves and over it on the rakes, per manufacturers specifications.
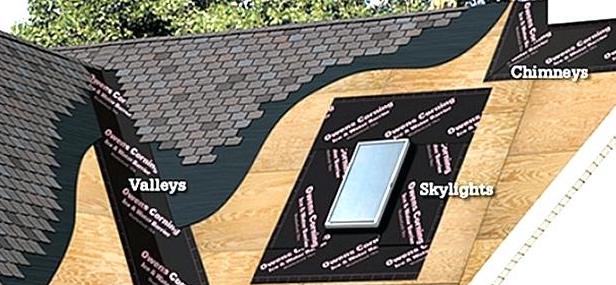
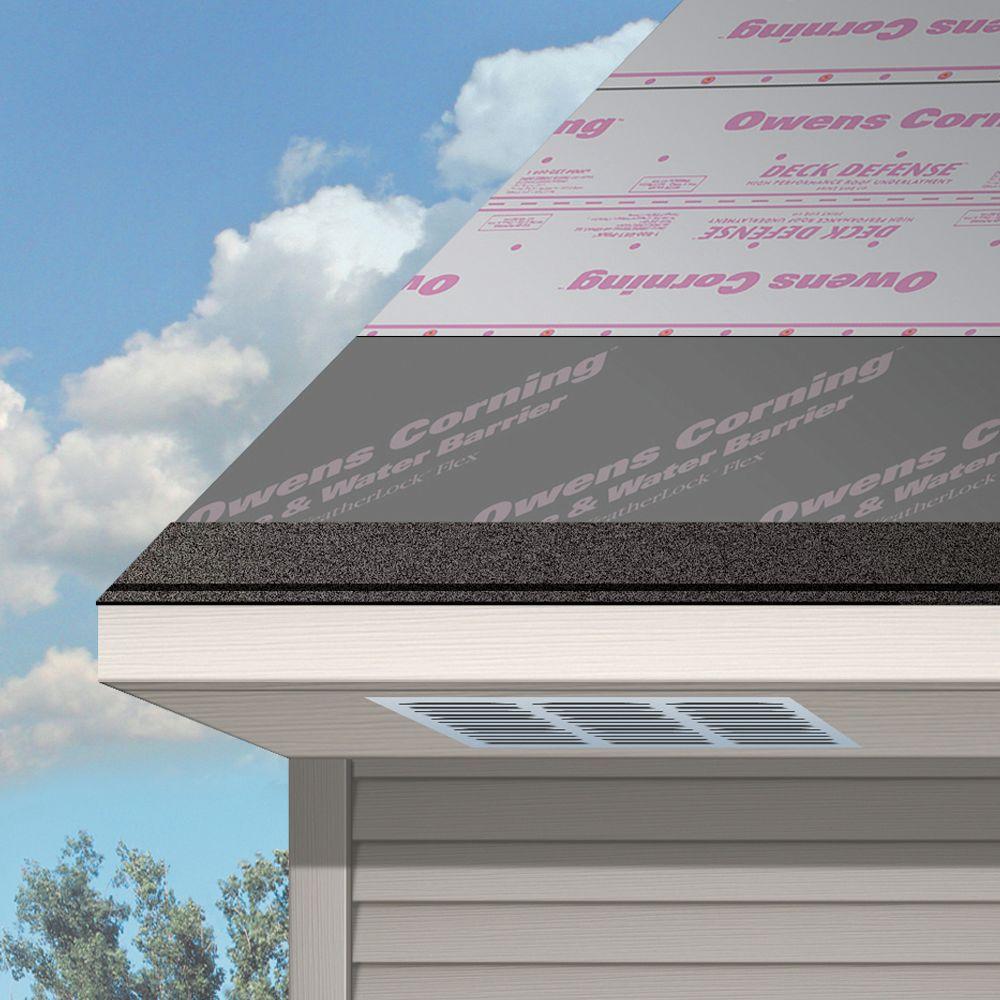
The next step in the installation process is putting down Ice and Water Shield. This product is a peel and stick, self-sealing mat that goes in the valleys, around protrusions, and at headwall junctures where flashing will go. This product is incredibly durable and water resistant and serves as a third line of defense in these leak prone areas. This product replaces valley metal, as some contracts will still use. The problem with valley metal is when you nail through it, water gains ingress through those unsealed nail holes. Ice and Water Shield seals around the nails.
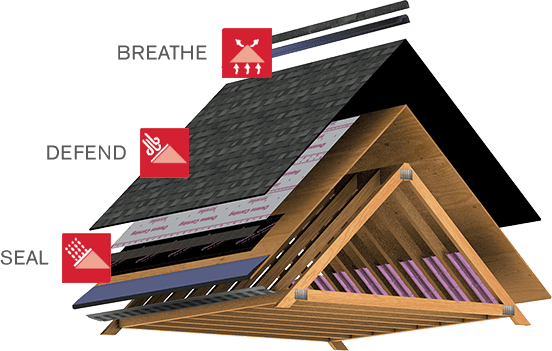
Next, the entire roof deck will be covered with synthetic underlayment. The benefits over the 15 or 30 pound felt that many contractors use are many and are listed elsewhere on this website. This product is installed with different overlaps depending on the slope of the roof, per code and manufacturers specifications. It is sometimes even doubled up on low slope applications, but the rolls are always lapped so that water running down the slope can not get in between the layers.
Immediately following the underlayment installation, our crews install Start Strip Shingles. These shingles are specifically designed to go around all the edges of your roof (the eaves and rakes). This product seals the exposed edge of your shingles and protects them from wind raising them up. A fringe benefit of this is, the rake edges of your roof do not bend over and stays straight increasing the curb appeal of your roof.
Other contractors in our area skip the added cost of this product, but lose the benefits it adds. They flip the shingles they use on the rest of the roof and attempt to use that shingles tar strip to seal the edges of the roof. The issue here is that the shingle is not nailed as far to the edge of the roof as possible and the tar strip is not as far out. This will void your manufacturers warranty.
The next step in the process is the one everyone will notice. The shingles. For slopes below a 2/12, we use a 3 layer self-adhering flat roofing system.
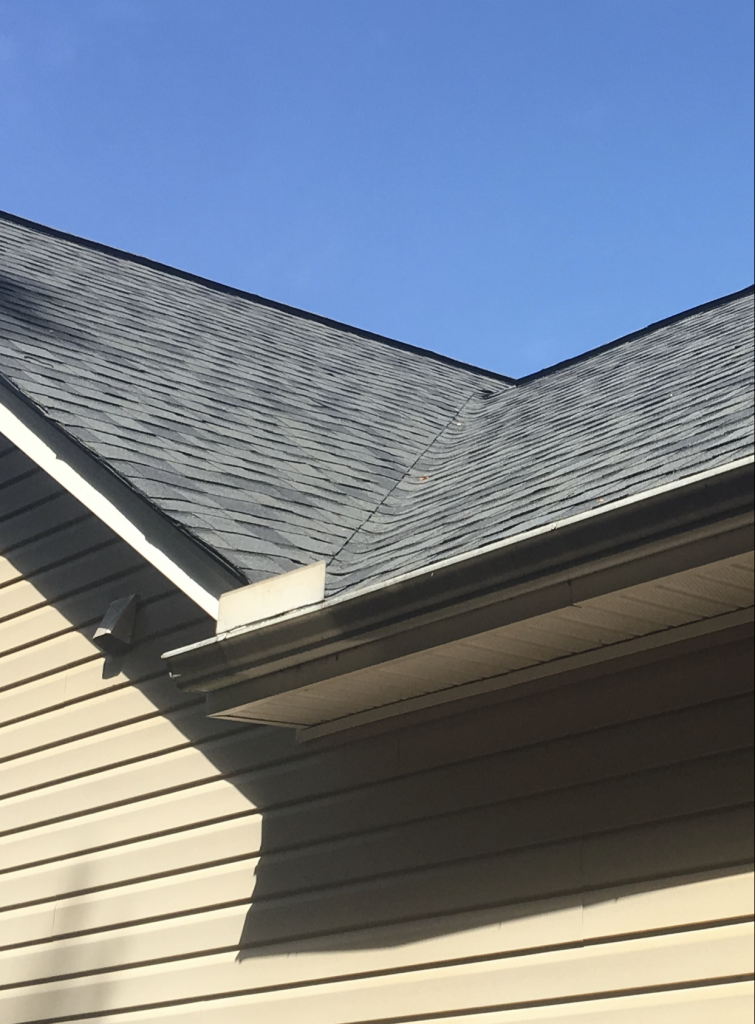
For slopes above a 2/12, the Laminate Architectural shingles are installed to the manufacturers specified exposure (offset) for proper appearance and performance. Additionally we follow the manufacturers guidelines for nailing pattern which depends on the slope of the roof. The Owens Corning Duration line of shingles that we use comes with the SureNail strip that gives our crew an easy target to hit the common bond area with the nails every time. Our closed-cut valleys are properly offset so that the cut line is not directly in the middle where water will flow during rainstorms (see picture). Many contractors mess this up. Where necessary, high quality roofing cement that will last the lifetime of the roof is used.
The next step is not done to code by 99%+ of roofers in the Metro Atlanta area. This step is flashing. The first step in our process is to lay Ice and Water Shield down on the deck of the roof bent at a 90 degree angle up onto the headwall, sidewall, or chimney. This step is not required by code, but it gives the roof a valuable backup plan incase the flashing system fails.
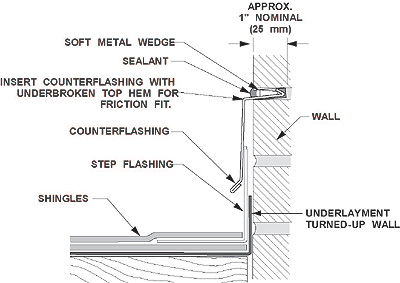
The next step is the most roofers get correct. Step Flashing serves as the base flashing. Step Flashing are L-shaped pieces of metal that are placed under each shingle that butts up against the vertical wall. One side of the L-shape lays under the shingle, and the other side attaches to the side of the wall with high quality silicone.
The final step of the process is required by Georgia code and is not found on 99%+ of roofs in our area. Without this step, you are relying on the step flashing to be installed perfectly with no gaps, and for the silicone to hold up for the lifetime of the roof. That step is Counter Flashing. Counter flashing sits on top of the finished roof and covers the step flashing from water intrusion from the top. The bottom is unsealed since the step flashing takes care of that part. This final layer is also called cover or cap flashing and is not necessary on vinyl/cement sided homes where the siding serves as the Counter Flashing.
We use the Reglet method of install for our Counter Flashing in most cases. We do this because this method provides a maintenance free flashing. A cut is made into the exterior masonry at a 90-degree angle. The flashing material is secured in this groove, sealed, and bent down to run alongside the exterior wall. Reglet flashing makes it impossible for water to get between the top of the flashing material and the exterior wall.
Counter flashing also provides a finished look to your roof.

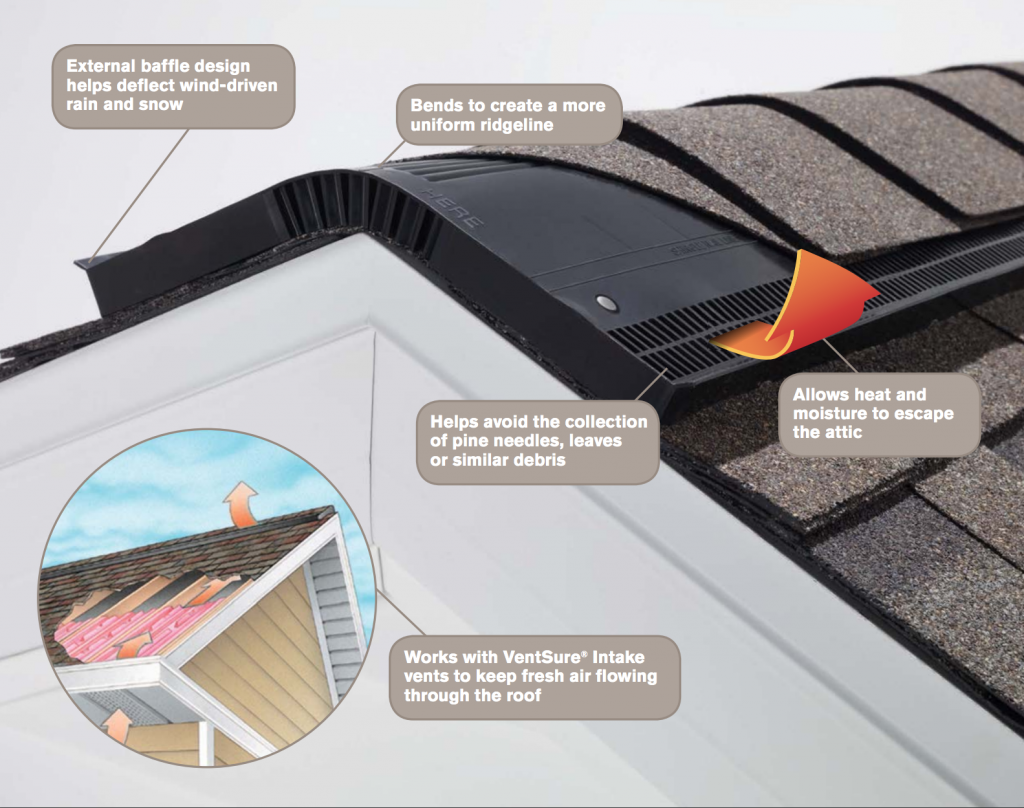
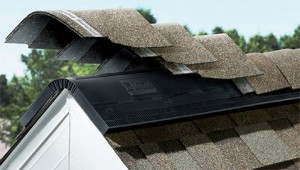
Next, a 6 inch gap (per manufacturer specification) is cut on the ridges and hips where ridge vent will be placed. Then, the ridge vent is placed and nailed in place. Ridge vent is far superior to the localizes and relatively small amount of ventilation that box vents provide. Ridge Vent gives optimal attic ventilation to protect your shingles and lower your energy bills.
Finally, proper Hip and Ridge Cap Shingles are installed over the ridge vent and the Hips and Ridges. These shingles are made for the application and give a 50% overlap. Many contractors in our area will skip out on the extra cost of these in favor of 3 Tab shingles. They cut the tabs off and use these as the Hip and Ridge cap. Doing it this way gives a significantly lower overlap, reduces your wind-resistance rating from 130 mph to 60 mph, and reduces your warranty from Limited-Lifetime to 2 years.
Finally, any exposed nail heads are siliconed and the cleanup and inspection process begins. The crew strives for 99.9% cleanup. After cleaning up all the shingles and the tarps, they will roll the yard with a magnet roller multiple times. This and the hand magnets gets up almost all of the nails. The crew will blow out the gutters and downspouts with an electric blower as well as blow off your driveway
A manager will alway perform a through inspection of the roof, house, and landscaping. After that is complete and the roof is determined to have met our strict standards, we will take the customer on a walk around. Only after the customer is completely satisfied with the roof and cleanup, we will request payment. After receipt of final payment, we will release the customer’s warranty paperwork.
